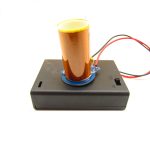
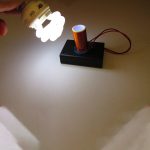
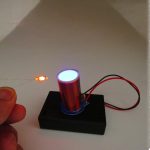
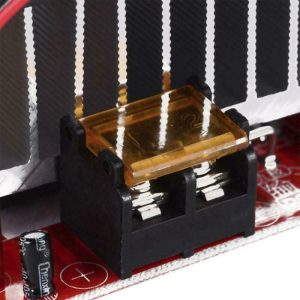
The main coil of the product is already on the PCB board and does not need to be wound outside. It is convenient for enthusiasts to install. It is efficient and beautiful. It is a new design. This Tesla coil is safe and does not cause electrocution to people. The electric arc can only be used to light the lamp in space, and it can be used for student experiments, course design, etc. All the devices are on-line, there is no fixture, and there are few devices, and the success rate is high, which is suitable for beginners.
Input voltage: dc4.5v, please do not exceed 4.5v, otherwise it will burn out
Input current: 180ma-380ma
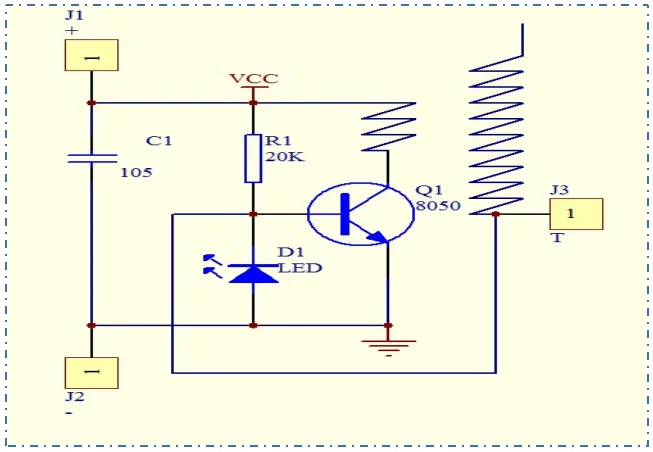
Schematic diagram:
Secondary coil parameters:
Enamel wire diameter: 0.13mm (with color 0.15mm)
Frame material: PVC pipe
Frame outer diameter: 2cm
Frame height: about 4 cm
Number of laps: 200 laps
Winding direction: Bottom-up direction
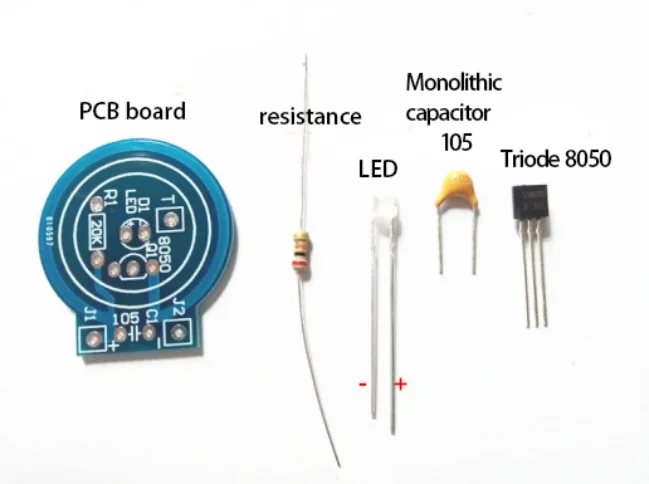
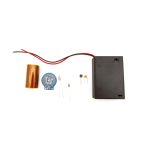
The package included:
1 x PCB board
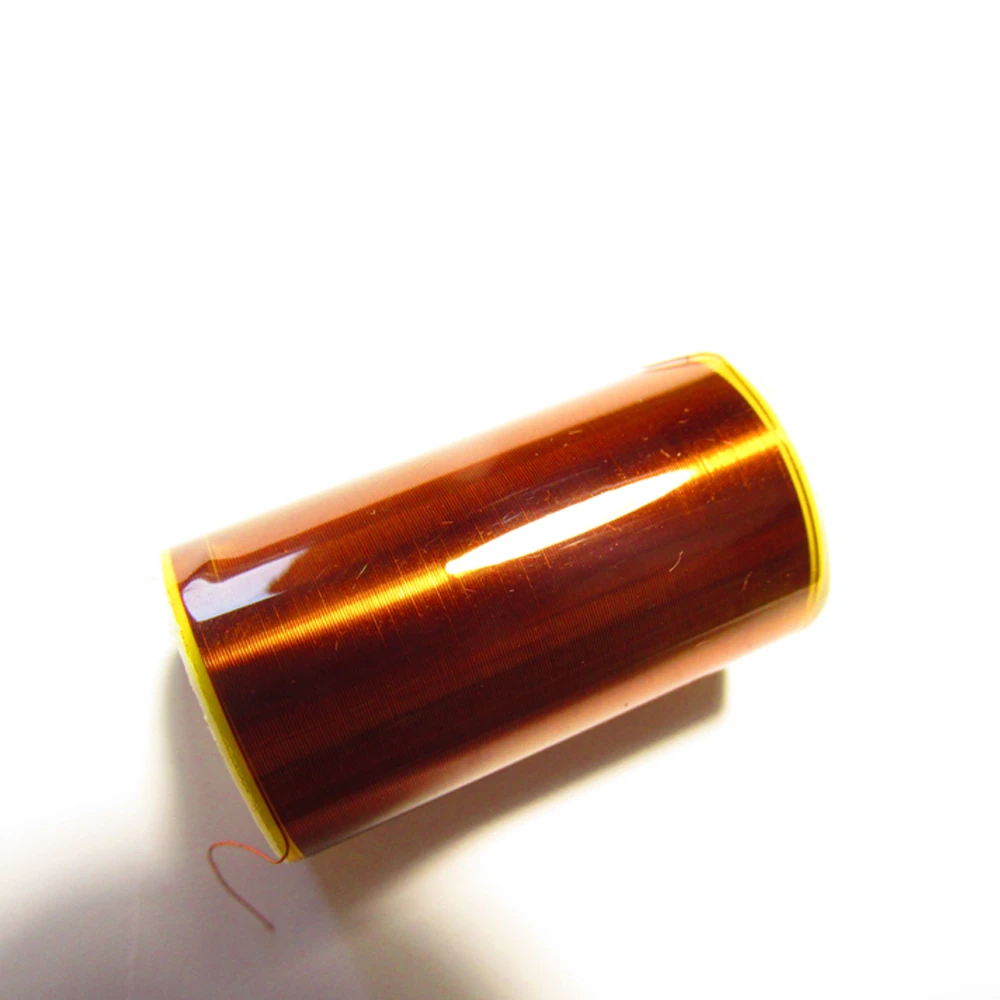
1 x Secondary coil
1 x AA battery box with switch
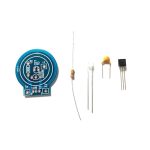
1×10⁵ Monolithic
1×8050 Transistor
1 x20k resistance
1 x3mm led
Small battery version tesla welding steps
1. Know the ingredients
2. The shortest component to be welded: resistance

3. For LED welding lights, the long leg is the positive pole and the short leg is the negative pole

4. Welding the 8050 triangle, pay attention to the silk screen on the kanban, flat to flat

5. 105 Monolithic welding capacitor, no polarity

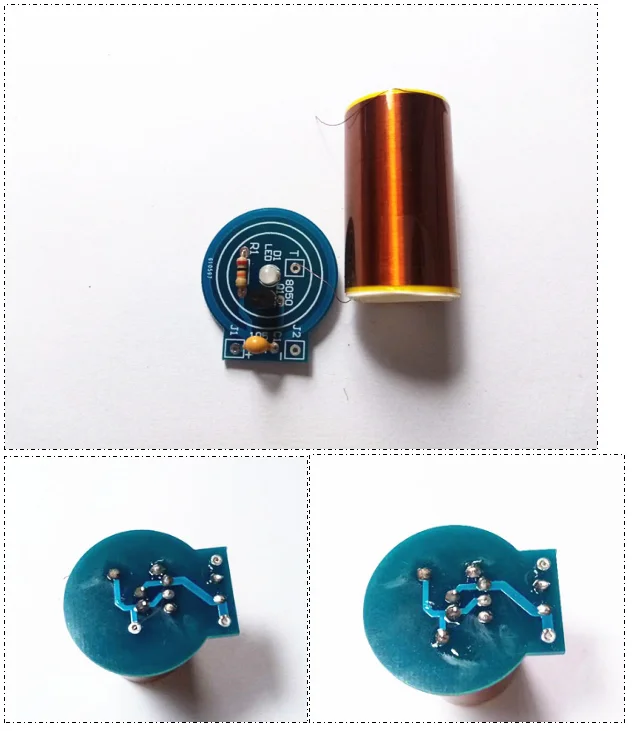
6. Deal with secondary coil
The primary coil is integrated on the PCB board, no soldering is needed, only the secondary coil is soldered.
The secondary coil is led by two copper wires, scrape the insulated paint at one end of the copper wire to expose the white copper wire. (If you find the end of the secondary coil pvc pipe with less white space, scrape the end with less white space. If both ends are almost white or there is no white space, just choose one end of the copper wire and scrape) The wire can not come out for a long time. Otherwise the coil will be useless!
Be careful not to burn it with fire, it is better to scrape with a blade, scrape gently, do not scratch, do not scratch, and do not pull out for too long!

7. To solder the secondary coil, insert the downward end of the secondary coil into the T-hole of the PCB board, and then solder it.

8. Welding the battery box and testing
After the secondary coil is welded, weld the battery box on. The red wire is welded to the positive electrode and the black wire is welded to the negative electrode. After welding, install the battery and test it. The LED light on the board is on, and the light of the bulb is close to it. You can also use an energy-saving lamp to close the test. It is about 3w to 5w. If it can also be bright, the welding is successful.
9. Fixed coil
After the test is successful, the secondary coil can be fixed with glue. It can be supplied with double-sided adhesive, or 502 adhesive. When fixing, be careful not to break the lead of the secondary coil!
10. This baby contains simple components, easy welding, safe battery power supply. This is Tesla’s entry-level kit. I wish you all successful welding!


 AC Pump
 Air Pump
 DC Solar Pump
 Brushless Motor
 Stepper Motor
 Servo Motors
 AC Synchronous Motor
 Linear Actuator Motor
 Audio Amplifier
 Convertor Boards
 Microcontroller
 Motor Driver
 Relay
Relay Voltage Regulator
 Charger & Power Supply
 Battery Holder Case
 Li-Po Battery
 Lithium iron phosphate battery
 Solar Panel & Inverter
 3D Printer Parts
 Body Chassis
 CNC Parts
 Gears – Gearboxes
 Hub – Motor – Wheel Coupler
 Motor Holders
 Enclosures & Cases
 Wheels – Shafts
 D
D


Reviews
There are no reviews yet.