Features:
1>.Dual operating system
2>.Support power supply output function
3>.Support power supply test function
4> Support over power protection
5>.High definition LCD display
6>.Automatic calibration
7>. Multi-parameter display simultaneously
8>.Support power saving mode
9>.Three voltage input methods
10>.Support voltage and current calibration
Parameters:
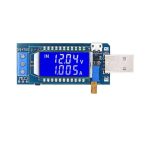
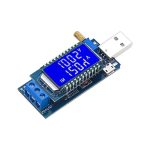
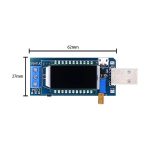
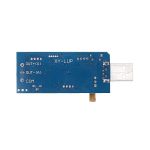
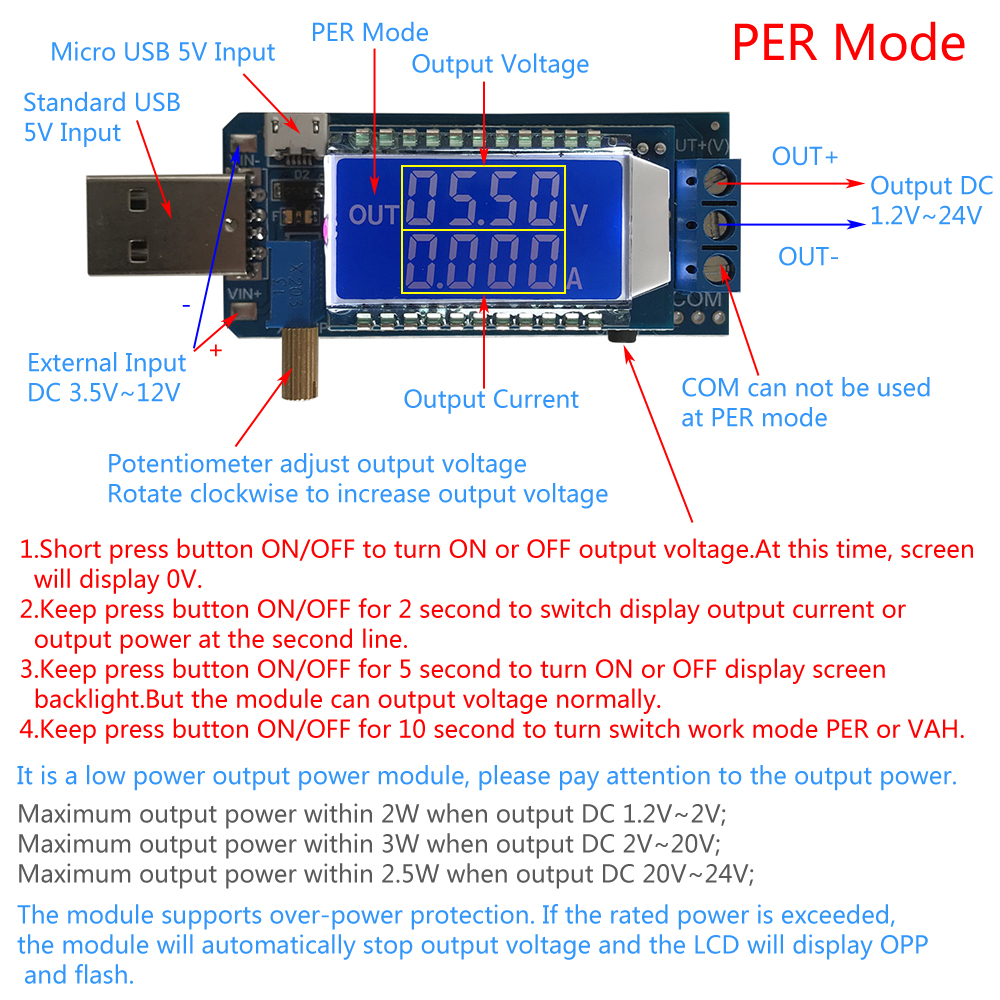
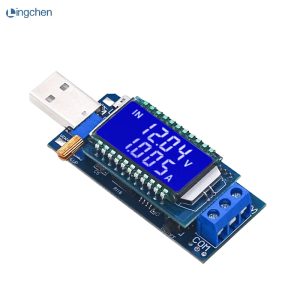
1>. Product Name: XY-LUP Boost Buck Converter Meter;
2>. Model: XY-LUP;
3>.Working voltage: DC 3.5V-12V;
4>.Output voltage: DC 1.2V-24V;
5>. Output power: 3W (max);
Maximum power within 2W when output DC 1.2V~2V;
Maximum power within 3W when output DC 2V~20V;
Maximum power within 2.5W when output DC 20V~24V;
6>. Output voltage accuracy: +/-0.5%
7>. Output voltage accuracy: +/-1%
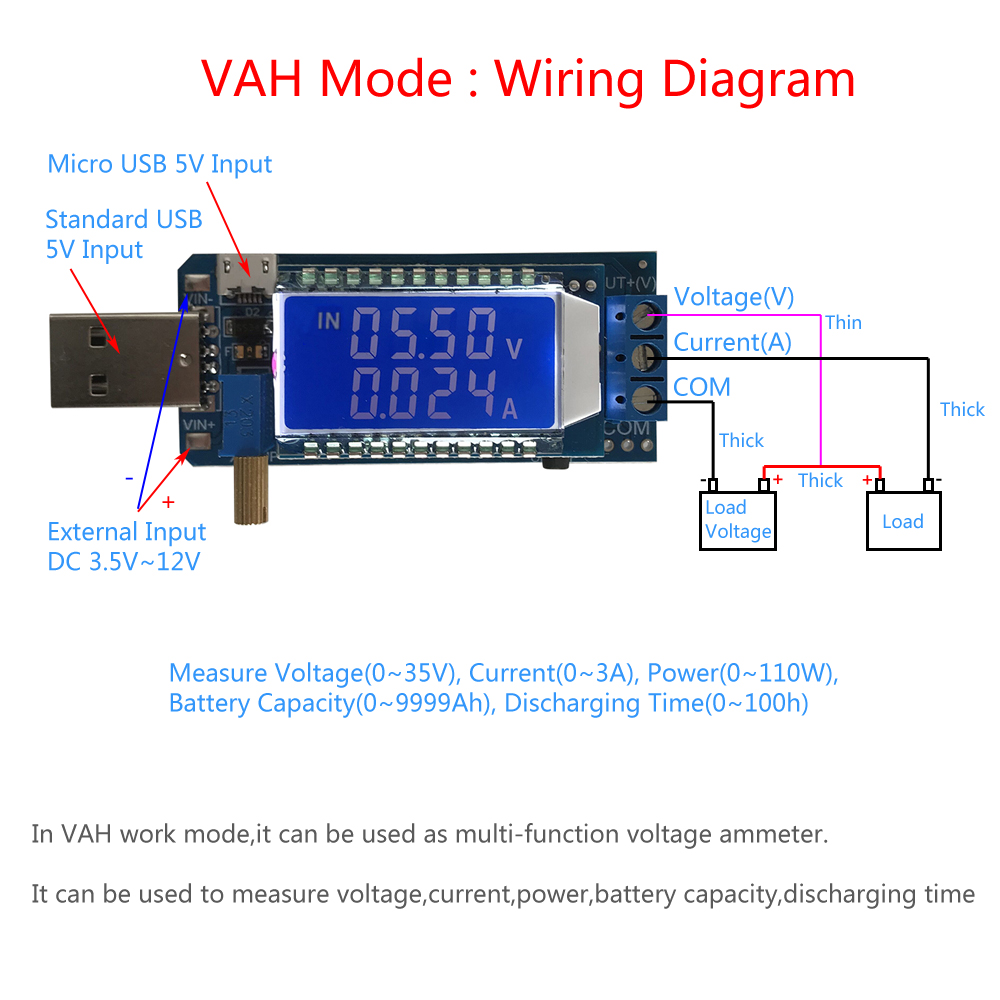
8>.Measure voltage range: DC 0~35V
9>.Measure current range: 0~3A
10>.Measure power range: 0~110W
11>.Measure battery capacity range: 0~9999Ah
12>.Discharge time: 0~100 hours
13>.Working temperature: -40°~85°;
14>.Working humidity: 0%~95% relative humidity;
15>.Size: 77*33*16mm;
Switching mode:
1. The default is the power output mode at all at first;
2. Keep pressing the “On/Off” button to switch mode;
3.When power is removed, module can remember current operating mode. The default work will be the same mode when at next time.
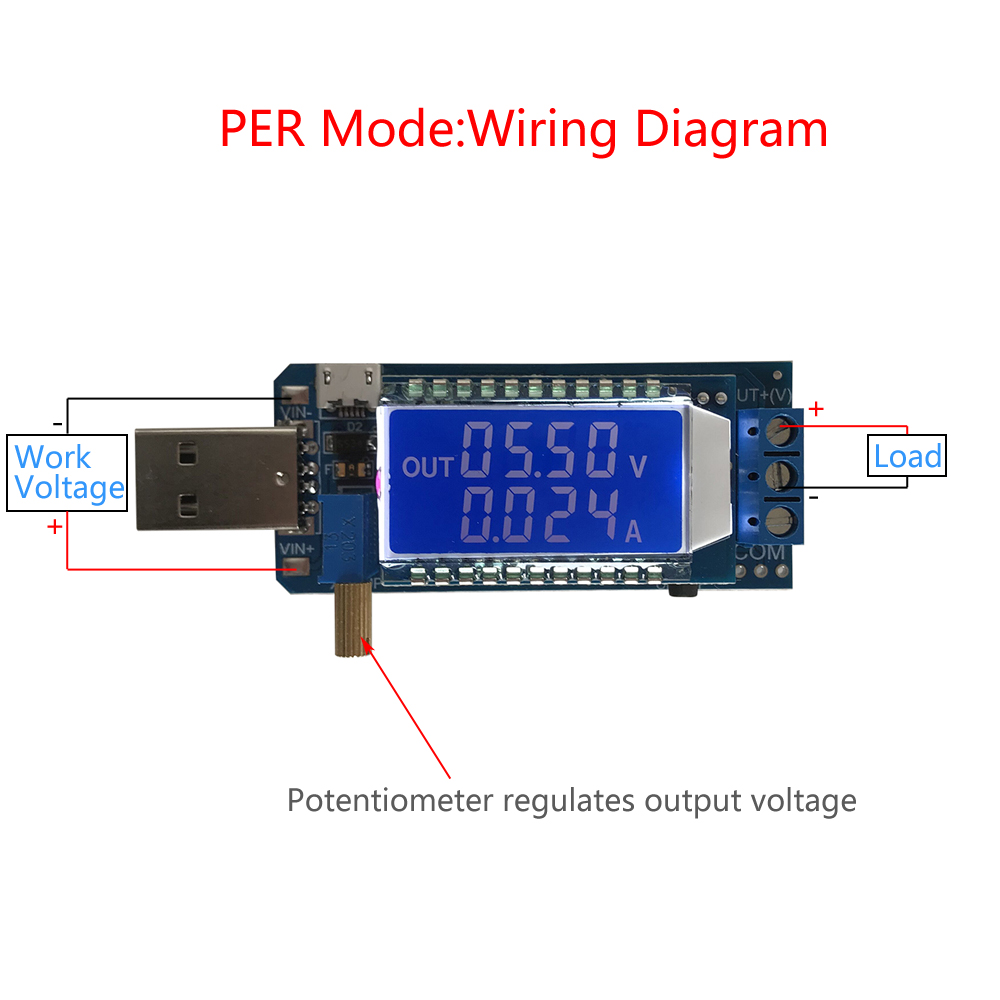
Power output mode per:
1. Input standard USB male socket, Micro USB female socket ‘VIN /VIN-‘;
2 Output from ” and ‘-\’. The ‘COM’ terminal can not be used for any mode.
3. Rotate the potentiometer to adjust the output voltage;
4. There is a symbol ‘OUT’ when working in any mode;
5. ‘COM’ terminal is available in any mode;
6. Short press the “ON/OFF” button to turn on or off the voltage output. At this time, the screen will display 0V.
7. Keep pressing the “Power On/Off” button for 2 second to switch display output current or output power second line.
8. Keep pressing the “ON/OFF” button for 5 second to turn ON or OFF the display screen backlight. But the module can output voltage normally.
9. Keep pressing the “ON/OFF” button for 10 seconds to turn the switch working mode to ALL or VAH.
10. The module supports over power protection. If the rated power is exceeded, the module will automatically stop outputting voltage and the LCD will display ‘OPP’ and flash.
11. The module does not support reverse connection protection, please do not short circuit in reverse.
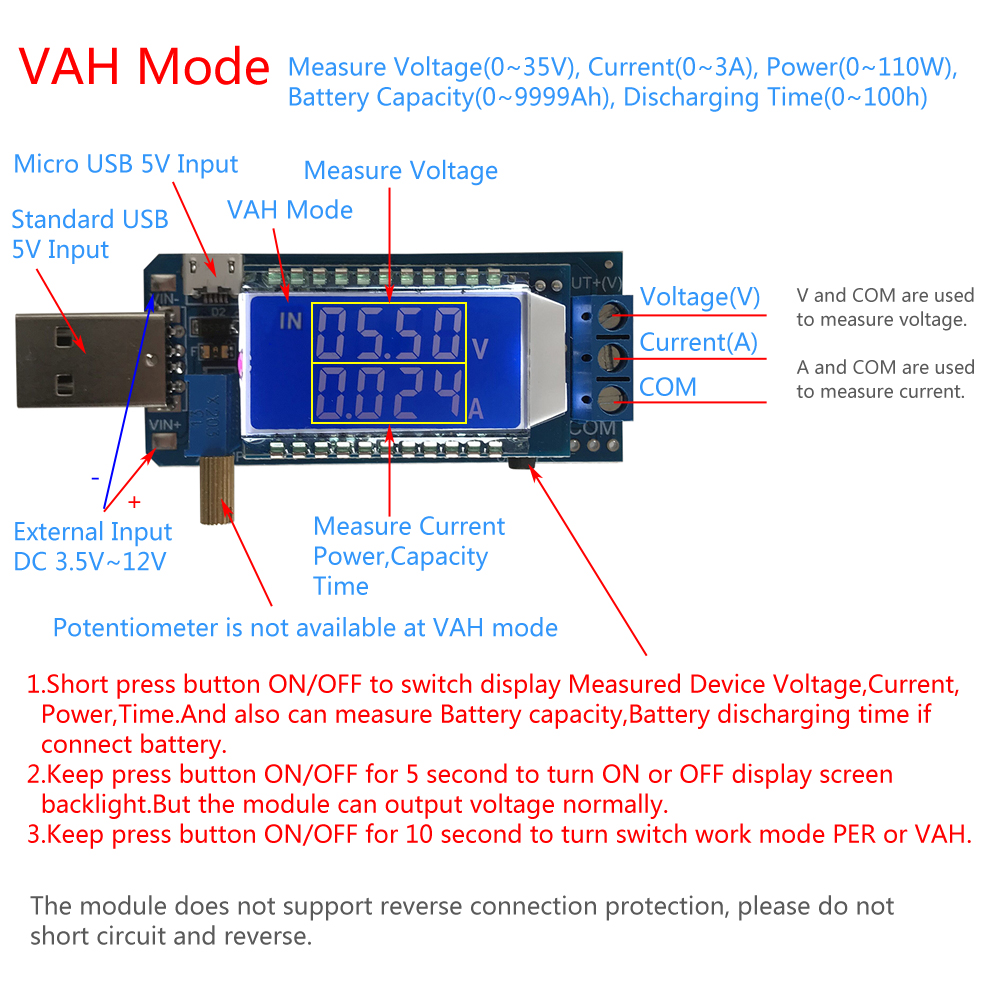
Multi function meter VAH mode:
1. Module working voltage: Standard USB male socket, Micro USB female socket ‘VIN/VIN-‘ are used to provide working voltage to the module.
2. Voltage measurement: ‘V’ and ‘COM’ terminals are used to measure the measured voltage of the device.
3. Current measurement: ‘ and ‘COM’ terminals are used to measure the measured device current.
4. Short press the “Power On/Off” button to switch display measured device voltage, current, power, time. And also can measure battery capacity, battery discharge time if connect battery.
5. Keep pressing the “ON/OFF” button for 5 second to turn ON or OFF the display screen backlight. But the module can output voltage normally.
6. Keep pressing the “On/Off” button for 10 seconds to turn the switch working mode to ALL or VAH.
7. The module does not support reverse connection protection, please do not short circuit in reverse.
8. Potentiometer is not available in VAH mode.
Calibrate voltage/current:
1. Calibrate voltage: Keep pressing the “Power on/off” button before power on and then power on and release the button. Automatically enter calibration mode after 5 second. The voltage display will be flashing. Short press button to adjust and calibrate voltage. Adjusting range is -0.2V~0.2V. Enter current calibration mode if keep pressing the button for 2 second.
2. Calibrate current: Enter current calibration mode if keep press the button for 2 second after calibrate voltage. Current display will be flashing. Short press button to adjust and calibrate voltage. Adjustment range is -0.02A~0.02A. Automatically save parameters and return to normal display interface if keep press the button for 5 second.
3. User needs to repeat the correction several times. If the voltage (current) error exceeds 0.2V(0.02A).
4. For example: changing 12V to 12.5V:
4.1. First calibration: change 12V to 12.2V
4.2. Second calibration: change 12.2V to 12.4V
4.3. Third calibration: Change 12.4V to 12.5V
Use steps:
1.Connect power supply input terminal;
2. Set working mode by keeping pressing the “ON/OFF” button for 10 second;
3. Connect to load or voltage device;
4. Rotate potentiometer to change output voltage if work in any mode;
5. Short press the “Power” button to switch parameter display;
6. Test and use.
Application:
1.Normal low power supply;
2. Voltage meter;
3. Ammeter;
4.Battery capacity tester;
5.Battery load capacity tester;
Package:
1.1pc XY-LUP Boost Buck Converter Meter;


 AC Pump
 Air Pump
 DC Solar Pump
 Brushless Motor
 Stepper Motor
 Servo Motors
 AC Synchronous Motor
 Linear Actuator Motor
 Audio Amplifier
 Convertor Boards
 Microcontroller
 Motor Driver
 Relay
Relay Voltage Regulator
 Charger & Power Supply
 Battery Holder Case
 Li-Po Battery
 Lithium iron phosphate battery
 Solar Panel & Inverter
 3D Printer Parts
 Body Chassis
 CNC Parts
 Gears – Gearboxes
 Hub – Motor – Wheel Coupler
 Motor Holders
 Enclosures & Cases
 Wheels – Shafts
 D
D


Reviews
There are no reviews yet.